
How to Create a Jenkins Server in Ubuntu
Installing Jenkins
The first step to getting a Jenkins server running on Ubuntu is to install Jenkins. There are 4 basic steps to installing Jenkins. These have been taken directly from the Jenkins install guide.
- Add the Jenkins Key
wget -q -O - http://pkg.jenkins-ci.org/debian/jenkins-ci.org.key | apt-key add - - Create a Sources List
echo deb http://pkg.jenkins-ci.org/debian binary/ > /etc/apt/sources.list.d/jenkins.list - Update the apt cache
sudo apt-get update - Install Jenkins
sudo apt-get install jenkins
This process downloads and installs Jenkins and all it’s dependencies to your machine. Now, Jenkins can be configured for your specific purpose.
Installing Git
Installing Git is even more simple than installing Jenkins. It is a simple command.
sudo apt-get install git
Install the Git Plugin for Jenkins
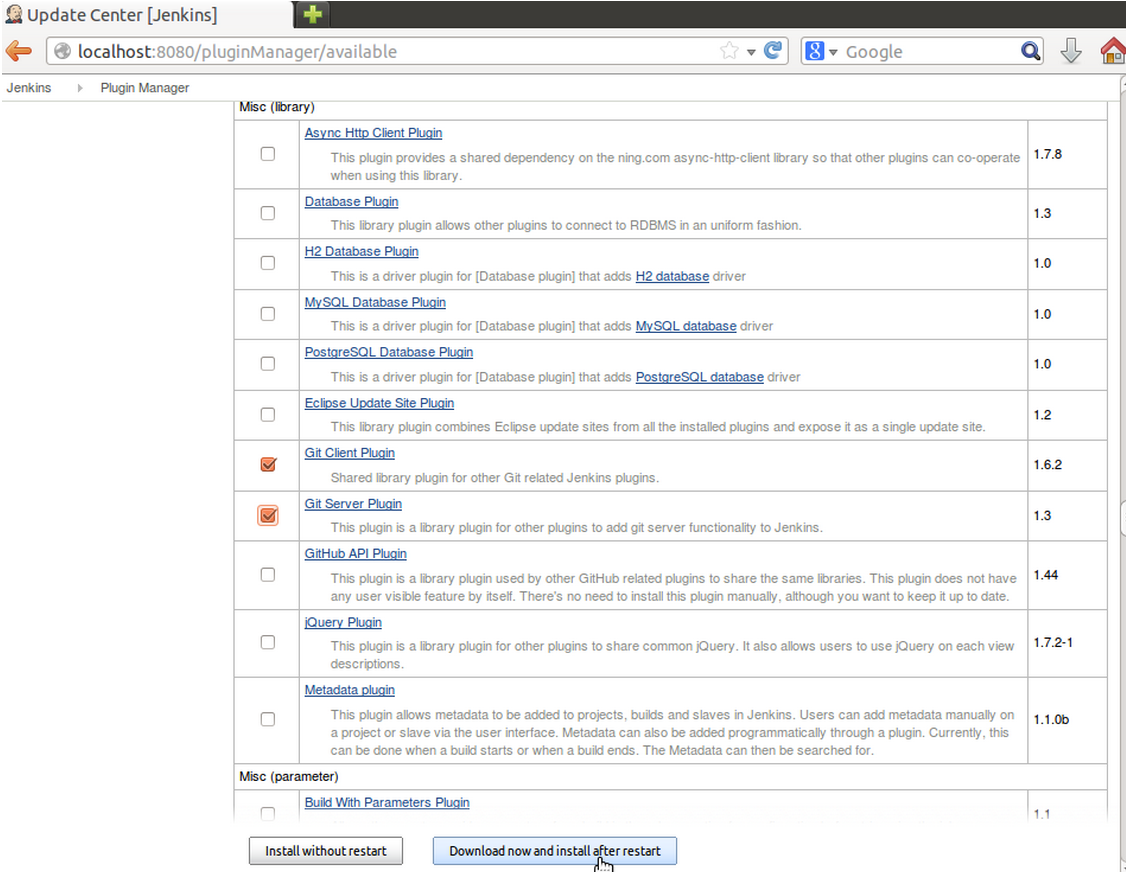
Now that Jenkins is running on your machine, the Git plugin must be installed. To do this navigate, go to
<Jenkins_URL>/pluginManager. By default, the Jenkins Server can be accessed by typing
localhost:8080
into your address bar. Scroll through the available listed plugins untill you find ones for GIT, then select them. Press the button which says “Download now and install after restart”. The files will begin downloading, and should be ready to use after your server restarts.
Creating an SSH Key
In order for the repository on BitBucket to communicate with the Jenkins Server, there must be some form of authentication between the two. This is done by creating an SSH key, and adding it to BitBucket. The steps for creating an SSH key are very straightforward.
First, you must access the Jenkins account on your machine. When Jenkins installs on your machine, it creates an account named jenkins. In order to access this account you must type into the terminal:
sudo su jenkins

This allows you access to the computer as the jenkins user. Now, when you create your SSH key, it is created for the Jenkins user, and not for the local user. To create the SSH key, type the following command into the terminal:
ssh-keygen
You will be prompted for a passphrase, which should be left empty. After this command runs, it creates two files, id_rsa and id_rsa.pub. These files are saved in a folder called .ssh in the Jenkins user’s directory.

Adding the Deployment Key to BitBucket
To add the Deployment Key to the BitBucket repository, navigate to the repository in a browser. Click the gear icon on the right side of the screen to access the repository settings. Click the link called “Deployment Keys” on the Repository details list on the left side of the screen . You should now see a screen with a button asking you to add a key. Before clicking this link, it is a good idea to open the file containing the Deployment key.
This file contains the key that BitBucket will use to authenticate the Jenkins Server. If you are unable to open the file with the jenkins account, you may have to switch to the normal user, and sudo into the file, which is what the image below shows.

Opening this file should show you a large block of text. Press the Add Key button in BitBucket and copy all of the text from the file into the text box in BitBucket. Create a Label for the key which identifies what machine or user it is for, then press Add Key.

To confirm that the key has been properly added to BitBucket and that the Jenkins server can communicate with BitBucket, sudo su back into the jenkins user on your machine, then enter the following command into your terminal:
ssh git@bitbucket.com
This is done to verify that the Jenkins user on the machine is correctly connecting to the BitBucket Server. You may get a message asking if you want to trust this connection, which you should enter ‘yes’. If you get a message saying that you have been logged in as your username in BitBucket, then you have been successfully connected.

Creating a New Jenkins Project
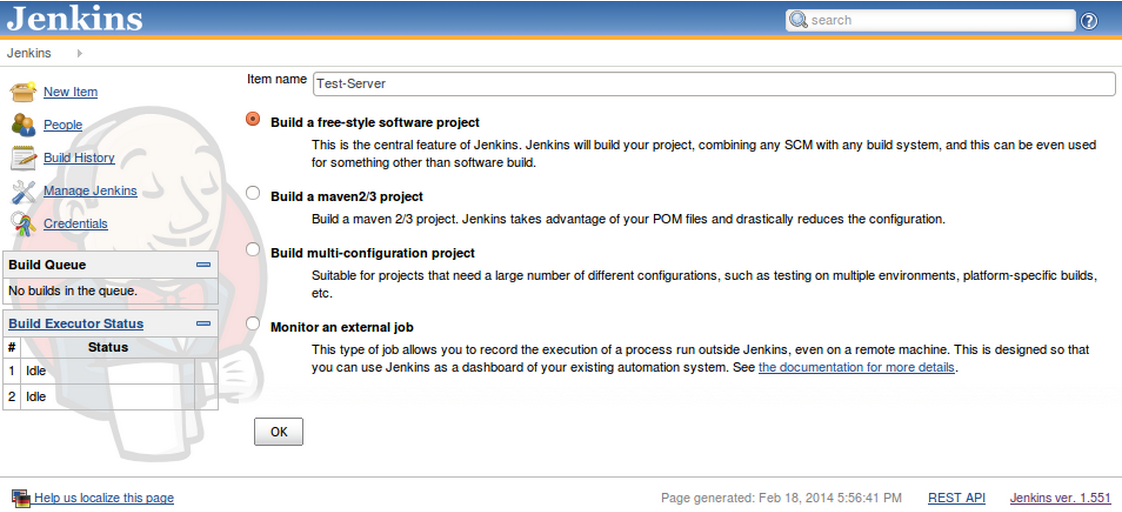
The next step of setting up your project with Jenkins is to create the actual project within Jenkins. This is done by clicking the New Item link on the left side of the main screen in Jenkins. The most standard selection for this purpose is the first option, the free-style software project. Enter the name for your project, then check the radio button and press OK.
Add Your Repository to Your Project
The next step of this process is to add your repository information to your Jenkins project. In order to do this, you must click your project’s name on the Jenkins home screen, then select configure, on the left side of the screen.

Once you add this to your settings and save, you can click the build now button on the left side of the screen. Jenkins will pull your repository, and build it. If everything goes well, then it will say that the build succeeded on the left side.
Configure Jenkins to Run ANT Scripts
Now that your project has been set up, and configured to your git repository, you can tell Jenkins to run ANT build scripts. To do so, you must add a build step under the Build properties, on your project configuration screen.
